How Stud Finders Work: Types, Detection Depth, and What They Can Miss
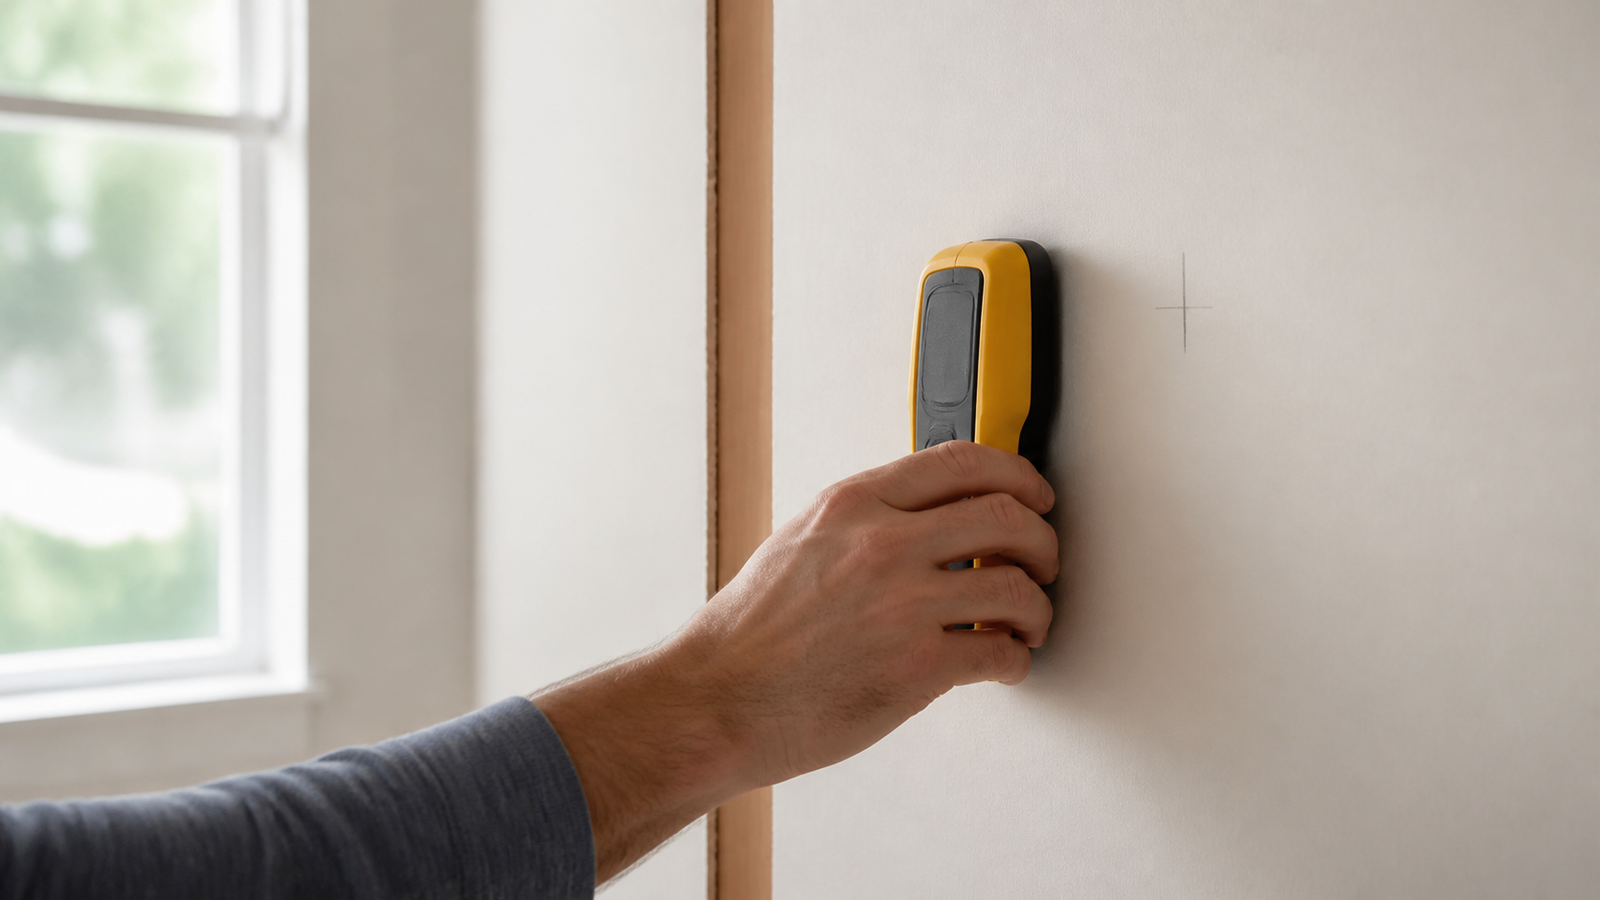
A stud finder looks simple: move it across a wall, wait for a light or beep, and mark the spot. The harder question is what caused the signal. Depending on the tool, it may be responding to a steel drywall screw, a change in material behind the surface, a broad detected area, live alternating-current voltage, or a combination of sensor readings. Those are not interchangeable findings.
That distinction matters when comparing specifications. A deeper scan is not automatically more trustworthy, a live-wire icon does not prove an area is safe to drill, and a device labeled a “wall scanner” may be solving a different problem from a pocket-size magnetic finder. This guide explains what the main technologies can and cannot tell you, which features are useful, and when paying more makes sense.
What a Stud Finder Actually Detects
Most stud finders do not recognize a piece of wood and announce, “This is a stud.” They react to something associated with an object behind or within the wall. What they react to depends on the design.
A magnetic finder attracts to ferrous metal. In a typical drywall installation, that metal is often a screw or nail driven into framing. Finding several fasteners in a vertical line can provide useful evidence of a stud, but the magnet has identified the fasteners, not the wood itself. It can also react to metal corner bead, protective plates, pipes, brackets, or other steel objects.
Basic electronic models generally sense changes in the wall’s effective density or dielectric properties as the tool moves across the surface. The change may indicate the transition from an empty cavity to framing. Depending on the electronics and display, the tool may identify an edge, estimate a center, or show a wider detected region. Calibration and movement are part of the measurement, so technique matters.
More advanced wall scanners combine more sophisticated sensing and processing, sometimes including radar. They may distinguish broad material categories such as wood, metal, or energized wiring and may estimate an object’s center or depth. Even then, the screen is an interpretation of sensor data—not an X-ray image and not a guarantee about what is safe behind the surface.
Magnetic vs. Electronic vs. Advanced Wall Scanners
The categories overlap, and manufacturers use terms such as “stud finder,” “multi-scanner,” and “wall scanner” differently. The practical comparison is what the tool senses, how much of the wall it samples, and how much interpretation it provides.
| Type | What the reading tells you | When it earns its keep | What it does not tell you |
|---|---|---|---|
| Magnetic finder | Ferrous metal is near the surface | Locating drywall fasteners on simple jobs without batteries or calibration | Whether the metal is attached to a wood stud |
| Electronic edge detector | The sensed material changes at this point | Mapping both sides of likely framing at low cost | What caused the change; the user still estimates the center |
| Electronic center detector | The tool calculates a likely center of the response | Making quick, repeatable marks on ordinary drywall | Whether the centered object is wood framing |
| Multi-sensor/full-width model | A wider sensor array sees a band of material | Seeing likely stud width without repeated edge passes | What every illuminated object is made of |
| Advanced wall scanner | The tool classifies one or more hidden-object signals | Remodeling or difficult work where material information changes the plan | Certainty; the display is still an interpretation |
Magnetic stud finders
For simple jobs, electronics may not solve a problem worth paying for. A magnetic model can locate a likely line of drywall screws or provide a second check on an electronic reading. A magnetic stud finder, for example, can use a rare-earth magnet to locate metal fasteners without batteries. That is a refreshingly clear specification: it finds fasteners. A line of those fasteners can be evidence of framing.
The tradeoff is speed and certainty. A small magnet covers little wall area, and buried fasteners can produce a subtle pull. It will not tell you whether the framing is wood or metal, where the exact stud edges are, or whether plumbing and wiring are nearby.
Edge-, center-, and full-width electronic models
An edge detector asks the user to mark one transition, scan from the opposite direction, and mark the other. The midpoint is the estimated center. Center-detecting models perform more of that interpretation and present a single target. DEWALT currently describes center-detect models with nominal scanning depths of 3/4 inch and 1-1/2 inches. Those ratings are examples of manufacturer-designed modes, not promises that every wall or object will behave the same way.
Multi-sensor models sample a wider strip of wall. Franklin Sensors’ current ProSensor M210 documentation describes multiple sensors and LEDs that show the detected stud’s position and width. The useful benefit is not merely a larger sensor count; it is seeing a broader pattern without repeatedly hunting for two edges. Sensor count alone should not be treated like horsepower. Coverage, display clarity, and repeatability are what affect the job.
Advanced wall scanners
An advanced scanner starts to make sense when the question changes from “Where is a likely stud?” to “What kinds of objects may be in this area?” Bosch’s D-tect 120 and GMS120-27 illustrate designs that provide center indication and information about detected material categories. That can help with remodeling and difficult surfaces. It does not turn an ambiguous wall into a transparent one.
The Stud Finder Specifications That Actually Matter
The most useful specifications describe how the finder behaves on the wall you actually have. Marketing-friendly numbers matter less if the tool is awkward to calibrate, difficult to mark from, or incompatible with the finish.
Detection depth and wall compatibility: A depth rating describes how far below the face of a supported surface the sensing system is intended to work under stated conditions. It does not mean every object at that depth will be identified correctly. Look for supported wall materials, separate modes, and limitations in the manual—not just the largest number on the package.
Edge, center, and sensor coverage: Edge detection takes more passes. Center detection makes marking quicker. Wider multi-sensor coverage can show an apparent stud width and make an odd result easier to notice. The useful specification is not the number of lights or sensors by itself. It is whether the display helps you reproduce and interpret the reading.
Calibration: Some electronic finders calibrate when placed on the wall; others adapt as they move. On designs that establish a baseline at startup, beginning directly over a stud or another object can cause an error or misleading result. “Automatic calibration” removes a step, not the need for flat contact, steady movement, and a compatible surface.
Material and live-wire indications: A wood/metal mode or material icon matters when the job involves more than finding framing under ordinary drywall. It can help separate a likely metal response from a wood-framing response, but it is still an interpretation. Live-wire warning adds another clue, not clearance to drill.
Display and marking: Check whether the display is readable while the tool moves, whether the body has a useful marking notch, and whether the result stays visible long enough to mark. A stable indication is worth more than a crowded display full of modes the buyer cannot interpret.
These same principles—separating a useful specification from an impressive-sounding one—apply across tools and equipment. The site’s Specs Explained guides use that buyer-focused approach for other product categories.
Detection Depth: Why Deeper Is Not Automatically Better
Greater depth is useful when the detector must read through thicker drywall, paneling, or another supported surface layer. It can also make the reading less selective. The farther the sensing field reaches, the more likely it is to encounter wiring, plumbing, blocking, fasteners, or material on the far side of the wall cavity.
Zircon’s official guidance distinguishes a standard Stud Scan mode intended for approximately 3/4-inch depth from DeepScan modes intended for approximately 1-1/2 inches. Importantly, Zircon advises using the shallow mode first and cautions that scanning deeper than necessary can detect other objects deeper in the wall. Those numbers describe Zircon’s stated modes; they should not be generalized into universal performance for all brands, surfaces, or targets.
For ordinary single-layer drywall, a repeatable shallow reading may tell you more than a noisy deep reading. Use deeper sensing when the surface assembly calls for it, not because the larger number sounds better. A useful tool also explains when to change modes and what an uncertain signal looks like.
Edge Detection vs. Center Detection vs. Full-Width Detection
Edge detection identifies a change near one side of a likely stud. Scanning from both directions helps compensate for the tool’s directional behavior and produces two marks. The user estimates the center between them. This method takes time but exposes useful information: if the two “edges” are extremely far apart, move between passes, or fail to repeat, the object may not be a normal stud.
Center detection reduces the marking process to one reported line. It is convenient for routine shelf brackets and similar work on predictable drywall. The problem is that a center arrow looks more conclusive than it is. The tool has calculated the center of a response; it has not proved that the response came from a wood stud.
Full-width displays illuminate multiple positions across the sensed object. They can reveal a normal-looking narrow band, a broad mass, or an irregular pattern. That makes them easy to use and may reduce calibration errors on some designs. It does not prove the illuminated band is a wood stud. DEWALT’s center indicators, Franklin Sensors’ multi-sensor width displays, and Bosch’s center/material displays are different interface strategies, not a ranking from basic to “best.”
Why Stud Finders Give False, Confusing, or Inconsistent Readings
A wall is not a controlled test panel. It can contain framing, fasteners, pipes, cable, insulation, adhesive, blocking, patched areas, moisture, and surface layers of varying thickness. Several of those can alter a magnetic or electronic sensor reading.
- Pipes and hidden objects: A dense or metallic object can produce a response that resembles framing, particularly in a general or deep scan.
- Electrical wiring: Cable may affect a material scan, while live-wire sensing depends on voltage, depth, orientation, shielding, and the surrounding materials.
- Uneven thickness: Joint compound, texture, patches, panel seams, and adhesive can change the distance and material between the tool and the cavity.
- Plaster and lath: Irregular plaster thickness and closely spaced wood lath create repeated density changes. Metal lath can overwhelm magnetic and electronic readings.
- Tile: Tile, mortar, backer board, adhesive, and possible waterproofing form a thicker, multi-layer surface that may exceed a basic finder’s intended conditions.
- Metallic and conductive layers: Foil-backed insulation, metal mesh, metallic wallpaper, or conductive wall coverings can create broad or continuous indications.
- Moisture: Damp material changes electrical properties and can distort readings or live-wire indications.
- Calibration and technique: Poor wall contact, lifting or tilting the tool, moving too quickly, changing speed, or beginning over an object can create inconsistent results.
When a finder appears to show studs everywhere, stop treating each alert as a stud. Look for a continuous conductive layer, unsuitable wall construction, an incorrect mode, low battery, poor calibration, or excessive depth. Switching to a shallower mode or a different detection method may provide more useful evidence than repeating the same pass.
Live-Wire Detection: Useful Warning, Not Permission to Drill
“Live-wire detection” sounds more reassuring than it is. An alert can change the plan, so the feature has value. No alert cannot establish that the wall is free of an electrical hazard. Bosch detector safety guidance warns that detectors can miss objects and should not be relied on exclusively before penetrating a surface. Zircon StudSensor manuals likewise warn that live AC wiring may not be detected under conditions involving depth, conduit, shielding or certain materials, and other limitations described by the manufacturer.
Safety note: Never treat a missing live-wire alert as permission to drill, cut, nail, or screw into a wall. Use multiple sources of information and follow appropriate electrical and plumbing safety precautions before penetrating any surface. If the consequences of a mistaken reading are significant or the wall construction is uncertain, stop and obtain qualified help.
Treat the feature as a warning channel. A positive alert deserves attention; a negative result is inconclusive. Check the tool’s manual for its specific limitations, and do not assume a more expensive scanner removes them.
Wood Studs, Metal Studs, Pipes, and Other Objects
“Something detected” and “wood stud detected” are different statements. A magnetic finder may locate the screw attaching drywall to wood framing, a screw attached to metal framing, or an unrelated steel item. An electronic finder may respond to wood framing, metal framing, blocking, a pipe, or a cluster of materials that changes the sensed field.
For a light hanging task on standard drywall, locating a consistent framing line may be enough. For anchoring cabinets, cutting an opening, drilling near kitchens or bathrooms, or working in a remodeled wall, material identification becomes more valuable. Advanced scanners can add evidence by classifying a response, but the result must still be compared with the wall’s layout and repeated from more than one direction.
Metal studs also change the fastening decision. A tool that merely finds a center does not tell you what fastener or load the assembly can support. Stud finding and load planning are separate problems.
How Wall Material Changes the Buying Decision
For a material-by-material troubleshooting guide, see Do Stud Finders Work Through Plaster, Tile, and Thick Walls?
Standard drywall is the easy case. Basic electronic finders are designed around this kind of predictable surface, and a magnetic finder can work well when the fasteners are close enough to the face.
Thicker or double drywall weakens magnetic attraction and may exceed a shallow electronic mode. A documented deep mode can help, but it also reaches more unrelated objects. Repeatability matters more than the maximum number on the box.
Plaster, lath, and tile are less predictable. Plaster thickness varies, wood lath creates many edges, and metal lath can produce a broad metal response. Tile assemblies add mortar, backer board, adhesive, and sometimes mesh or other conductive layers. Look for explicit compatibility rather than assuming a deep mode will solve the problem.
Metal mesh and conductive coverings can keep a finder from separating a narrow object from the layer in front of it. More modes will not fix a surface construction the manufacturer excludes. An advanced scanner designed for the material—or qualified help—may be the more sensible purchase.
How to Verify a Stud Before You Drill
Verification matters most when the attachment is heavy; the TV-mounting guide applies this process to mapping a full mounting area. If no electronic finder is available, compare the evidence-based methods in How to Find a Stud Without a Stud Finder.
Think of stud finding as mapping evidence, not receiving a yes-or-no answer. Start with the correct mode and steady wall contact, then check whether the result behaves like framing.
- Repeat the pass at the same height and confirm that the indication returns to the same location.
- When the tool and surface permit, scan from the opposite direction and compare the marks.
- Check above and below the first reading for a consistent vertical pattern rather than an isolated spot.
- Compare the likely location with other framing clues, such as nearby outlets, trim, corners, and plausible spacing, without assuming any one clue is definitive.
- Use a second method—such as a magnetic finder to locate fasteners—when the cost of being wrong is meaningful.
Conflicting evidence is a reason to pause. A very wide response, a reading that shifts with scan direction, or an alert that appears only in deep mode may be telling you that the wall contains something more complicated than a single wood stud. Verification reduces uncertainty; it does not promise certainty.
Which Features Are Worth Paying For?
- Occasional pictures and light shelves: A cheap magnetic finder may be all the tool required on standard drywall. A basic edge detector buys speed. Paying for several material modes makes little sense if the jobs never call for them.
- Routine homeowner DIY: Center detection or a full-width display can make repeated bracket, shelving, and storage projects quicker. Prioritize repeatable readings, an obvious marking point, low-battery indication, and calibration instructions that make sense.
- Thick or difficult surfaces: Look for documented compatibility with the actual surface and a separate deep mode. A basic finder does not become suitable for plaster or tile because it occasionally beeps there.
- Remodeling or multiple hidden-object types: An advanced scanner can justify its price when material classification or better mapping would change the plan. The extra money buys information, not permission to cut without other checks.
Bottom Line
The most useful stud finder is not necessarily the one claiming the greatest depth or the most detection modes. A magnetic finder can be a dependable way to locate likely fasteners. A center or full-width electronic model can make ordinary drywall work quicker. An advanced scanner can provide more context when walls and projects become complicated.
Start with the wall, the object you need to locate, and the cost of a wrong reading. Whatever the price, treat the finder as one source of evidence. Repeat the reading, map the pattern, and never interpret silence from a live-wire detector as proof that penetration is safe.
Frequently Asked Questions
Are magnetic stud finders accurate?
They can accurately locate sufficiently strong, shallow ferrous metal. That metal is often a drywall fastener associated with framing, but it could be another object. Finding multiple fasteners in a consistent vertical line strengthens the inference.
How deep can a stud finder detect?
It depends on the model, mode, wall material, and object. Common manufacturer ratings include roughly 3/4 inch for standard modes and 1-1/2 inches for deeper modes, but those are model-specific conditions, not universal performance.
Can a stud finder detect pipes?
A finder may respond to a pipe, especially if it detects metal or a broad density change. A basic model may not identify the response as plumbing. Material identification and repeat mapping become more important when pipes are plausible.
Can you trust live-wire detection?
Trust a positive alert as a reason to stop and investigate. Do not trust the absence of an alert as proof that no wire is present or that drilling is safe. Manufacturers explicitly warn that objects and energized wires can be missed.
Do stud finders work through plaster or tile?
Some models are designed for certain thicker or difficult surfaces, but plaster, lath, tile, mortar, backer board, mesh, and conductive layers can confuse readings. Check explicit manufacturer compatibility rather than assuming a deep mode will work.
Why does my stud finder keep showing studs everywhere?
Possible causes include metal lath, foil-backed insulation, conductive coverings, moisture, uneven material, an unsuitable scan mode, poor calibration, or scanning too deeply. If the result is broad and nonrepeatable, treat it as an unknown condition rather than a wall full of studs.