What Size Air Compressor Do You Need?
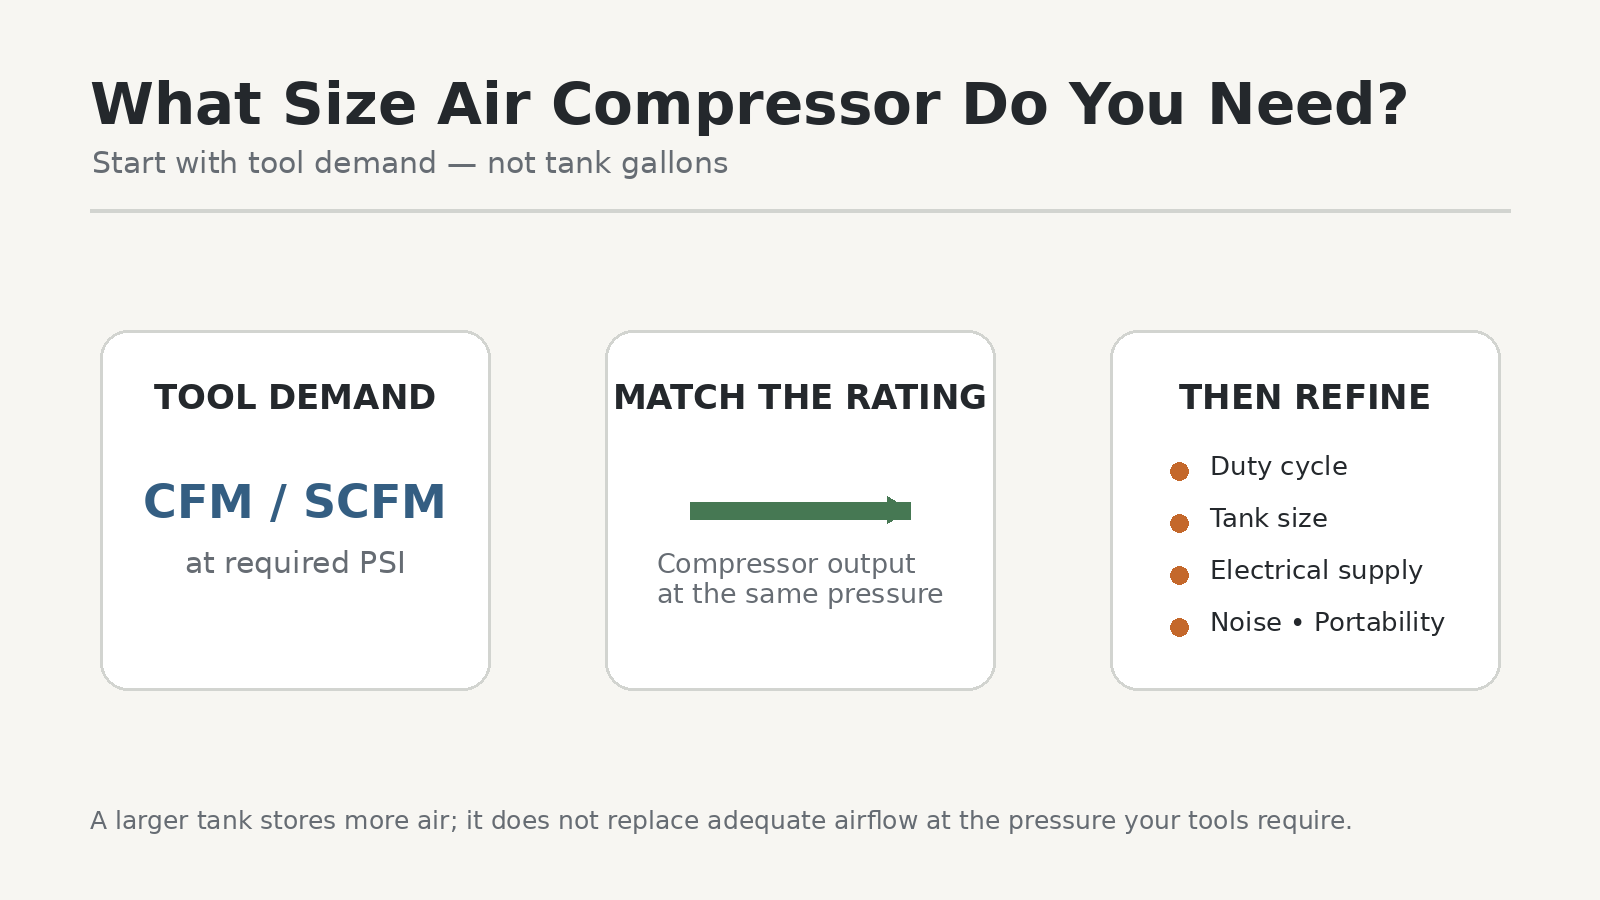
The fastest way to buy the wrong air compressor is to start with tank gallons. A 20-gallon machine can be too small for one tool and unnecessarily large for another. The useful starting point is the air demand of the tools you plan to run.
For most homeowner setups, size the compressor around required airflow at the required pressure, then check duty cycle, tank capacity, electrical supply, noise, and portability.
Quick answer
Find the manufacturer’s airflow and PSI requirement for the most demanding tool you expect to use. If you will run tools together, add the airflow for the tools that truly operate at the same time. Then compare that demand with the compressor’s delivered SCFM/CFM at the same or a higher stated pressure.
Campbell Hausfeld recommends 1.5 times the required SCFM in its DIY sizing guidance. Quincy advises adding a capacity margin after totaling expected demand. Those are useful manufacturer approaches, not a law that every tool and compressor must follow. Use the actual tool and compressor manuals first.
Step 1: write down the tools you will really use
Do not size a compressor around a fantasy garage. List the pneumatic tools you already own or are reasonably likely to buy.
For each one, record:
- Required airflow: CFM or SCFM
- Required operating pressure: PSI
- Whether the rating is average consumption, consumption at load, or another test condition
- Whether the tool runs in short bursts or for long stretches
If the manufacturer does not publish enough information to size the air supply confidently, that uncertainty belongs in the buying decision.
Step 2: decide whether tools run one at a time or together
A one-person garage usually does not need to power an impact wrench, sander, spray gun, and nailer simultaneously. If you will only operate one tool at a time, the highest individual airflow demand is usually more relevant than the sum of every tool in the cabinet.
If two or more tools really will operate together, add their required airflow. Ingersoll Rand’s compressor selector asks buyers how many pieces of equipment they will power, what the air usage looks like, what CFM is required at maximum pressure, and what PSIG is required. See Ingersoll Rand’s compressor selector questions.
Step 3: keep the PSI attached to the airflow number
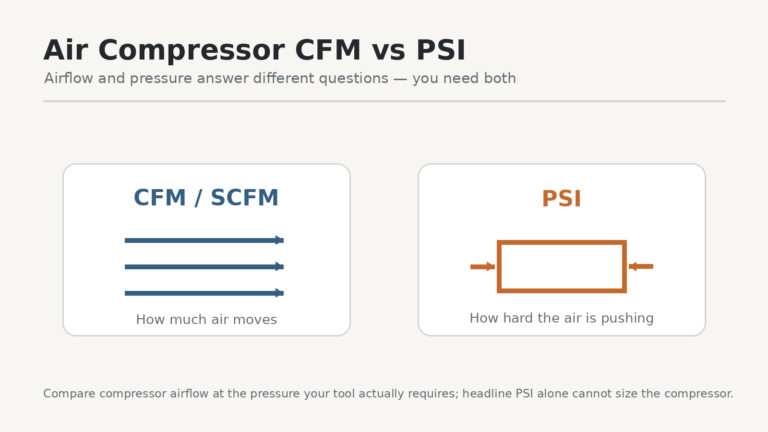
A compressor advertised at 6 SCFM is not automatically a match for a tool that needs 6 SCFM at 90 PSI. The compressor’s flow rating has to be stated at a pressure that makes the comparison meaningful.
This is the core idea behind our CFM vs PSI guide: airflow and pressure have to be considered together.
When possible, compare:
Tool required SCFM/CFM at X PSI
against
Compressor delivered SCFM/CFM at X PSI
If the compressor is only rated at a lower pressure than the tool requires, do not assume it will deliver the same airflow after pressure is raised.
Step 4: add margin deliberately, not magically
A little headroom can keep a compressor from living at its limit, but there is no reason to invent one universal percentage and pretend it fits every situation.
One conservative garage-sizing method is to total the CFM requirements of equipment that may operate simultaneously and multiply by 1.5. See Quincy Compressor’s garage-sizing guide.
Quincy also recommends totaling the air demand of equipment that may operate simultaneously and then adding a safety margin. See Quincy’s capacity guidance.
The margin is there to cover real operating conditions and keep the machine from being selected on a knife edge. It does not fix a mismatch in required pressure, duty cycle, or electrical supply.
Step 5: distinguish average consumption from air consumption at load
This is one of the easiest specifications to miss.
Ingersoll Rand publishes both average air consumption and air consumption at load for some impact wrenches. Its 2015MAX, for example, lists 3.5 CFM average air consumption but 19 CFM at load at 90 PSI. Those figures answer different questions.
For a tool used in short bursts, average consumption can be useful for estimating overall demand. For continuous or sustained use, the loaded requirement may be much more important. Read the manufacturer’s definition instead of copying the first CFM number you see.
Source: Ingersoll Rand 2015MAX/2025MAX specifications.
Step 6: check duty cycle for continuous tools
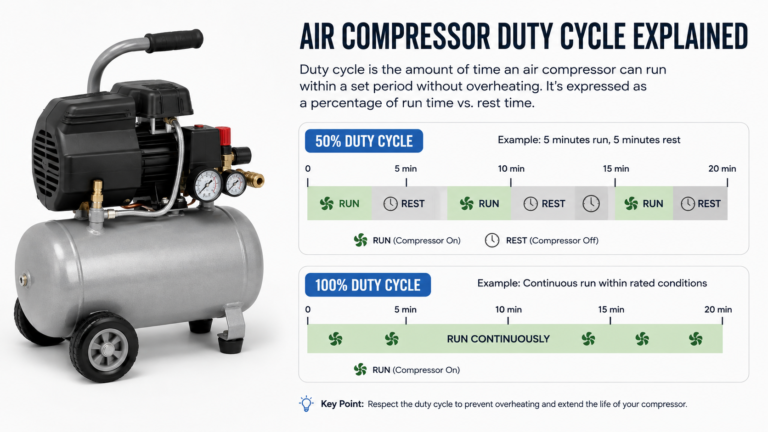
A compressor can have enough headline airflow for a task and still be a poor fit if the pump is not designed to run as often as the job demands.
Nailers are intermittent. Sanders, grinders, and some spray work can be much more continuous. Quincy explains duty cycle as the percentage of a cycle during which a compressor is designed to operate. See Quincy’s duty-cycle explanation.
If you expect long, sustained tool use, duty cycle belongs near the top of the shopping list.
Step 7: use tank size to refine the choice
A larger tank stores more compressed air. That can provide a longer burst before the pump has to recover and can reduce how quickly pressure swings during intermittent demand.
It does not turn a low-output pump into a high-output pump. If the tool continuously consumes air faster than the compressor can replace it, the tank eventually loses the race.
See Air Compressor Tank Size Explained for the storage-versus-output distinction.
Real tool examples show why generic charts are risky
| Manufacturer example | Published air requirement | Lesson |
|---|---|---|
| Makita AF601 finish nailer | Manual calls for more than 3.0 CFM at 70 PSI under a rapid nailing example | Nailers can be low-demand in normal use but firing rate changes consumption. |
| Campbell Hausfeld DH650001AV spray gun | Minimum 7.0 SCFM at 40 PSI | Some spray equipment needs substantial flow even at lower pressure. |
| Ingersoll Rand 2015MAX impact wrench | 3.5 CFM average; 19 CFM at load; 90 PSI | “Average CFM” and loaded demand can be very different. |
Sources: Makita AF601 manual, Campbell Hausfeld spray-gun specifications, and Ingersoll Rand impact-wrench specifications.
These are examples, not a universal air-tool chart. For a broader explanation, see How Much CFM Do Air Tools Need?
Three common homeowner sizing patterns
Inflation and occasional fastening
These jobs are often intermittent. If the compressor meets the tool’s pressure and airflow requirement, portability and recovery between bursts may matter more than owning a huge receiver.
General garage tools used one at a time
An impact wrench used briefly, a nailer, and occasional blow-off work can often be sized around the most demanding single tool rather than the sum of every tool in the garage. The exact loaded-air requirement still matters.
Sanding, grinding, or spraying for long stretches
Continuous demand changes the answer. Pump output and duty cycle become much more important, and a larger tank only delays an airflow shortfall if the tool consumes air faster than the pump can replace it.
The point is not that one compressor size fits each category. It is that usage pattern determines which specification becomes the bottleneck.
Step 8: check electrical supply before you fall in love with the compressor
Small portable compressors commonly use 120-volt household power. Larger stationary compressors may require 230 volts and a dedicated circuit. Ingersoll Rand’s 60-gallon single-stage machines, for example, are specified for 230-volt single-phase power.
Check:
- Voltage and amperage
- Plug or hardwiring requirements
- Breaker/circuit requirements in the installation manual
- Whether the manufacturer permits extension-cord use
If an extension cord is allowed, our extension-cord gauge guide explains why cord length and conductor size matter for motor loads.
Step 9: account for hose size and pressure drop
The compressor can meet the published numbers at its outlet and still disappoint if the hose, fittings, filter, regulator, or couplers restrict flow excessively.
Some pneumatic-tool manufacturers publish a minimum hose size alongside air consumption. Ingersoll Rand does this on many air-tool specification pages. Follow those requirements rather than assuming every 1/4-inch fitting and skinny hose is interchangeable.
Use the Air Compressor CFM Matcher
The matcher below is designed for manufacturer values you enter yourself. It does not use a canned database of “typical” air-tool demands.
Use the tool manufacturer’s required airflow and PSI and the compressor manufacturer’s delivered airflow at a stated PSI.
Air Compressor CFM Matcher
Enter the tool maker’s airflow and pressure requirements, then compare them with the compressor’s delivered airflow rating.
This calculator compares published ratings; it does not replace tool or compressor manuals. Pressure must meet or exceed the tool requirement, and continuous use also depends on duty cycle.
If the tool lists only “average air consumption”
Look for more context before sizing a compressor for sustained use. Average figures may assume the trigger is released part of the time. If the manufacturer also publishes consumption at load, use the number that matches how long the tool will actually be working.
If the specification is ambiguous, a larger airflow margin may reduce risk, but the better answer is still to get the manufacturer’s loaded or continuous-use requirement rather than guess.
What size tank should you choose?
Tank size is mostly a workflow question once airflow is adequate. A small tank can be perfectly useful for inflation and intermittent nailer work. A larger receiver can give demanding intermittent tools more stored reserve and reduce rapid cycling.
For continuous high-air-demand tools, pump output and duty cycle matter more than buying gallons as a workaround for inadequate CFM.
“What size compressor?” is not really a gallons question
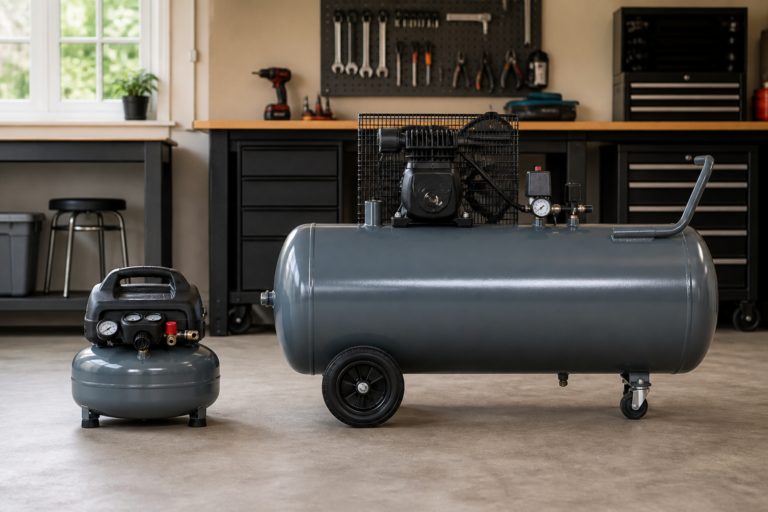
People often use “size” to mean physical size or tank gallons. For tool matching, the more useful size is delivered air capacity at pressure. A compact compressor with high delivered airflow can outperform a physically larger low-output machine for some jobs, while a large stationary unit may offer the airflow, duty cycle, and storage a continuous tool needs.
That is why the matcher focuses on airflow and pressure first and leaves gallons as a separate workflow decision.
Common sizing mistakes
- Buying by maximum PSI while ignoring airflow.
- Buying by tank gallons while ignoring pump output.
- Comparing a tool’s CFM at one pressure with a compressor rating at another.
- Adding every tool in the garage even though only one runs at a time.
- Using average air consumption for a tool that will run continuously at load.
- Ignoring compressor duty cycle.
- Ignoring 120V versus 230V electrical requirements.
- Assuming a large tank fixes insufficient continuous airflow.
Bottom line
Size an air compressor from the tools backward. Find the airflow and PSI the tools require, decide what runs at the same time, add a deliberate margin, and then check whether the compressor can deliver that airflow at the relevant pressure.
After that, use tank size, duty cycle, electrical requirements, noise, portability, and maintenance to choose between machines that actually meet the air demand.